

This year I had a great harvest. I didn't get to freeze any, but it's only because I eat a lot of tomatoes when they're fresh. My favorite is sliced and salted. If I want a hot meal, I smash the tomatoes, simmer them with a tiny bit of seasoned grease (those with cans of "saved" grease in the cupboard know what I'm talking about), and spoon them over white rice. Served with fried chicken, pork chops, or eaten alone as a stew, they make for a great winter dish. Unfortunately, I'll be doing that with store bought cans of tomatoes again this year.
I went outside to see if there were any of my favorites left. The best tomato I grew this year had to be the Green Zebra. It was tangy and tart with just the right texture. It was great for slicing, even if a bit small, and excellent in the method described above. I want to plant a lot more of them next year.

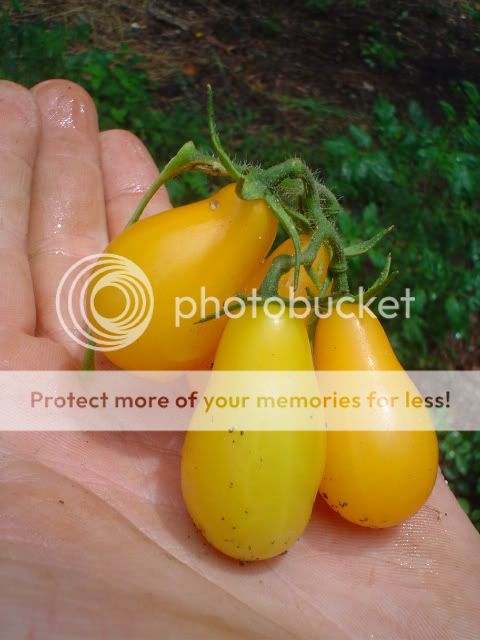
In the "grape" variety, the Yellow Pear was excellent. They were easy to pick in bunches and tasted great standing in the garden. Next year, more more more.
I also found a nice red rutgers. Last week I picked a juicy, sweet tomato from a plant that was not labeled. I believe it was a rutgers. I used the method described below to save seeds from it.
First, you start by cutting and squeezing the pulp and seeds from a good specimen. I don't have the best fruits right now, so what I have will suffice, I hope.


I fill glasses with a couple inches of water. Toss in the goop and seeds. Let sit 3-4 days. Each morning while my coffee is brewing, I will swish the gunk and water around a couple times. This process destroys most diseases and some blights that could be carried over from year to year. It's fermenting. From left to right, Hawaiian pineapple - sweet and juicy yellow/orange fruit, Green Zebra, Rutgers, Yellow Pear.

After several days, I'll throw the mess into a kitchen sieve and rinse the seeds well. They'll be spread out on a coffee filter to dry. It takes about a week or more to dry completely. Any moisture in the seeds needs to be removed before storage. These seeds have been air drying for several days. They're from the red, juicy no name tomato.

In case I missed anything, here's where the information came from. I don't cover with plastic wrap. I don't know why. I just don't.
Saving Tomato Seeds - GardenWeb - by Trudi
5 comments:
you are coouunntry! Did you eat rice for breakfast? I know exactly what you mean. :)
You have convinced me to try saving tomato seeds one more time. I've never been able to get beyond the pulsating slime in the jar on my kitchen counter as they "ferment," but your description makes it all sound worthwhile....
Hi Tom. Did you know that Trudi has updated her tomato seed saving process to include cleanser to further prevent disease transmission? Here is the link:
http://www.wintersown.org/wseo1/CleanTomatoSeeds1.html
Jim, we used to have fresh diced tomatoes spooned over our grits too. :)
Tim, give it a try. And check out Kris's link below.
Thanks Kris. I didn't know it was updated. I'll make a note of it.
So that's how it's done! I just rinse the seeds and hope nothing falls into the drain when I throw away the water.
Won't it germinate though if you leave it in water for a couple of days?
Post a Comment